To fix a leaking shower head, we recommend identifying when and where it leaks, removing the head while holding the arm steady, replacing a worn washer, renewing any manufacturer-required thread seal, then hand-tightening and testing. At Wise Workman, we help you compare plumbers when the repair needs professional attention.
A dripping shower head after shutoff needs a different response than water escaping a connection during use. Replacing the head only helps when the fault is in the head itself.
Stop and arrange help for: water behind the wall flange; a moving arm or cracked fittings; shutoffs that fail to stop water.
When and Where Is Your Shower Head Leaking?
We recommend matching the shower head leak to its timing and location before buying parts.
| Symptom | Likely cause | Next action |
| Continuous dripping after shutoff | Valve cartridge or worn valve seals | Assess the control valve |
| Arm connection leaks during use | Washer, damaged threads, or thread seal | Inspect the joint |
| Water escapes faceplate or dial | Mineral deposits, blocked nozzles, damaged seals, or cracks | Clean or inspect the head |
| Head flows during tub-only use | Possible stacking or diverter valve issue | Check the tub/shower setting |
| Handheld hose-end leak | Misplaced or worn rubber washer | Inspect hose washers |
| Water at wall flange | Possible hidden connection leak | Stop and arrange inspection |
Continuous Dripping After Shutoff vs. Water Left in the Head
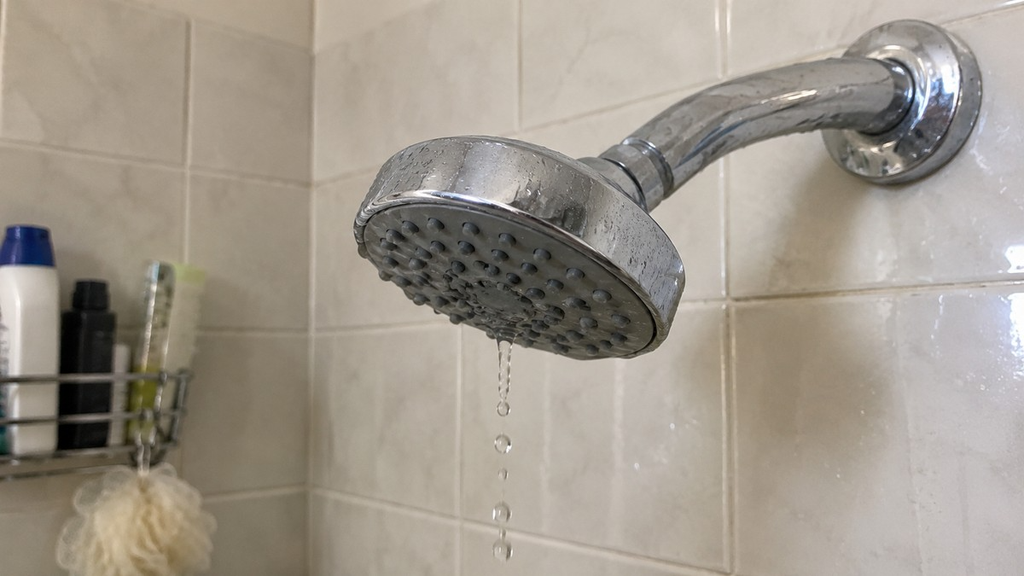
Retained water drains from some heads after use, with drops slowing and stopping. Mineral deposits affect how that water escapes, so a single late drip does not establish a valve failure. To confirm the source, Kohler’s valve troubleshooting suggests removing the head from the shower arm: if the drip stops, it was residual water in the head, and if it continues from the arm, the valve is leaking.
A steady drip that keeps returning points toward the shower control valve. We recommend assessing whether you need to replace a shower cartridge before spending money on another head.
Leaks at the Arm Connection, Spray Face, or Handheld Hose
Dry accessible surfaces before running the shower, then watch where moisture first appears. Water travels along fittings, making the lowest drip misleading.
At a hose end, inspect its rubber washer. At the spray face, distinguish stray nozzle streams from water escaping a seam or cracked housing.
Water at the Wall Flange or Shower Flow During Tub Use
Water emerging from behind the wall flange needs professional investigation. Avoid sealing the trim to hide the symptom.
Shower flow during tub use is sometimes called stacking: water backs up toward the head because of restricted tub-spout flow. Check that the diverter valve or selector is fully in its tub position; persistent flow needs diagnosis.
What Should You Prepare Before Removing the Head?
Our preparation advice is to identify the model, gather compatible parts, and confirm that water flow stops before loosening anything.
Gather Tools and Model-Matched Replacement Parts
Keep these items within reach:
- Soft cloths and a towel.
- A flashlight and soft toothbrush.
- The correct rubber washer or O-ring.
- A strap wrench or padded wrench, only if permitted.
- PTFE thread-seal tape, also called Teflon tape, only if specified.
Confirm the brand and model before purchasing seals. If the diagnosis points beyond accessible parts, your shower repair cost will depend on the failed component and access needed.
Turn Off the Shower, Protect the Finish, and Close the Drain
Turn the shower fully off and allow retained water to drain. If the valve keeps dripping, shut off the water supply before removing the head.
Close or cover the drain to catch small parts. Place a towel on the shower floor and protect decorative finishes wherever an approved tool will touch.
Hold the Shower Arm Still and Stop if It Moves
The shower arm is the pipe extending from the wall. Support it while loosening the head so turning force stays away from the concealed connection.
If the arm rotates or wobbles at the wall, stop. Additional force risks disturbing the fitting behind the tile.
Repair the Leaking Shower Head, Connection, or Handheld Hose
We recommend working only on the accessible component linked to the leak, following the specific model’s sealing and tool instructions.
Remove the Head Without Twisting the Shower Arm
Unscrew the head’s connection nut while keeping the arm stationary. Start by hand and use a padded tool only where the manufacturer permits it. Stop if the connection resists enough to move the arm. Successful removal leaves the arm in its original position with the head separated.
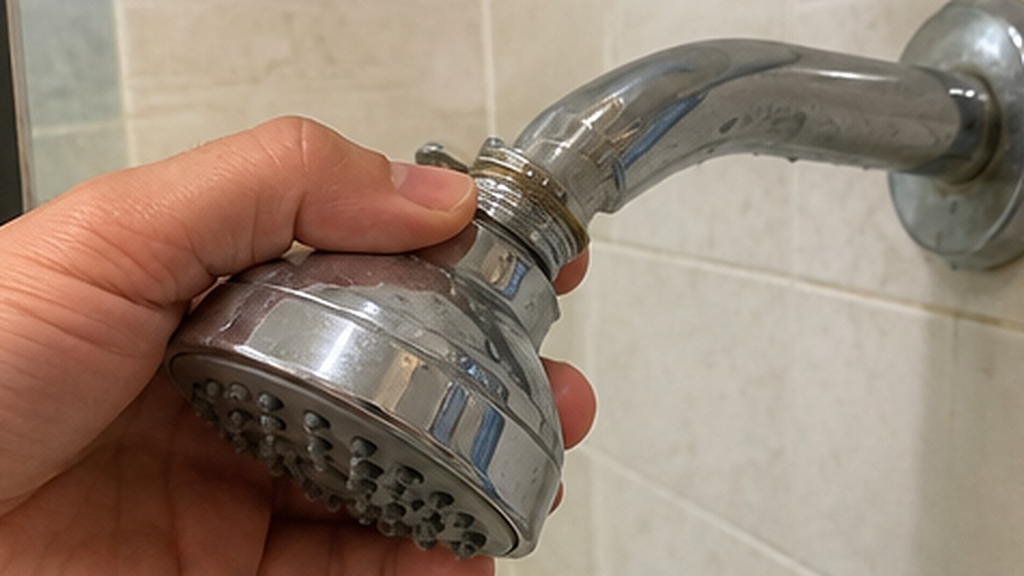
Inspect and Seat the Correct Washer or O-Ring
Fit the specified seal into its clean seat. A flat rubber washer seals between mating faces; a rounded O-ring sits in a shaped groove. Replace hardened, split, or distorted seals, and use compatible silicone grease only when approved. The correct washer or O-ring rests evenly without twisting or protruding.
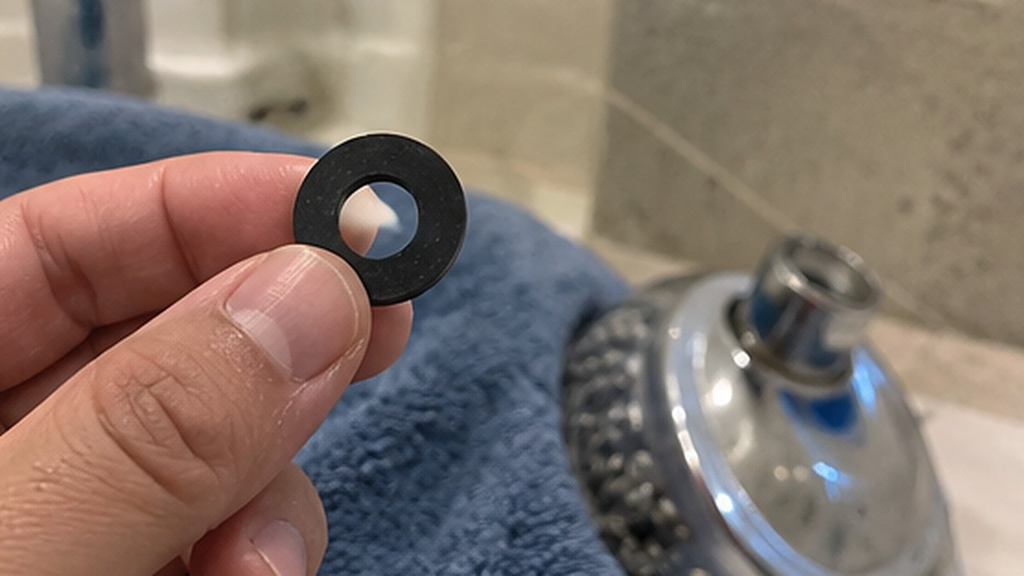
Check the rubber washer before adding plumber’s tape. If the shower head leaks where it meets the shower arm, inspect the washer inside the connection, since it may be missing, damaged, or seated incorrectly. Replace it if needed and reinstall the head. Do not add Teflon tape automatically, because some connections rely on the washer rather than the threads for a watertight seal.
Renew Thread Seals Only as the Manufacturer Directs
Apply the specified thread seal to the approved connection. Some models permit Teflon tape on shower-arm threads only; washer-sealed hose fittings commonly seal at their mating faces. Follow the model’s directions for tape placement and amount, because unapproved tape or tools risk damage and warranty problems. The finished joint has the required seal with no loose material blocking the opening.
For example, Delta notes that plumber’s tape is optional for most of its showers.
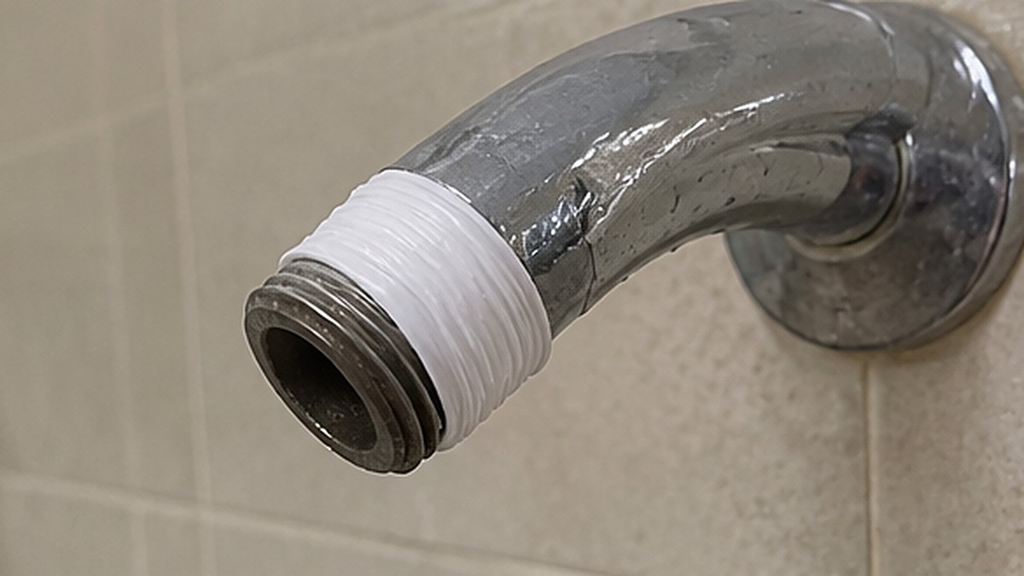
Remove old Teflon tape before reinstalling the shower head. If the head keeps leaking after installation, take it off and check the existing seal. Clean away old thread tape, inspect the rubber gasket for cracks or deformation, and make sure the gasket sits correctly before tightening the head again.
Clean Mineral Deposits With an Approved Method
Remove mineral deposits using the fixture’s approved cleaning method. Use white vinegar or a descaler only when permitted for the finish and seals, following the stated dilution and contact time. Avoid abrasive cleaners, unapproved chemicals, and forcing objects into nozzles. After rinsing, the treated openings should be clear of loosened deposits.
If weak spray remains, assess other causes before trying to increase shower pressure.
Replace Damaged Hoses or Cracked Shower Heads
Replace the damaged accessible assembly with a compatible part. Use a matching hose for splits or leaks through the hose body, and replace a cracked head unless its manufacturer provides a repair. Inspect hose-end washers during replacement and preserve any vacuum breaker, which helps prevent backflow. The replacement assembly should be undamaged with its required seals in place.
Hand-Tighten, Run the Shower, and Check for Leaks
Reconnect the fitting by hand. Start it squarely so the threads engage without binding, then follow the manufacturer’s tightening instructions. Add tool force only if expressly permitted. The seated connection should feel secure without a crushed washer or strained housing.
Run the shower and inspect each repaired joint with dry tissue. Then turn it off and observe whether drainage stops. A successful head-level repair leaves connections dry during use and no continuing valve-fed drip afterward.
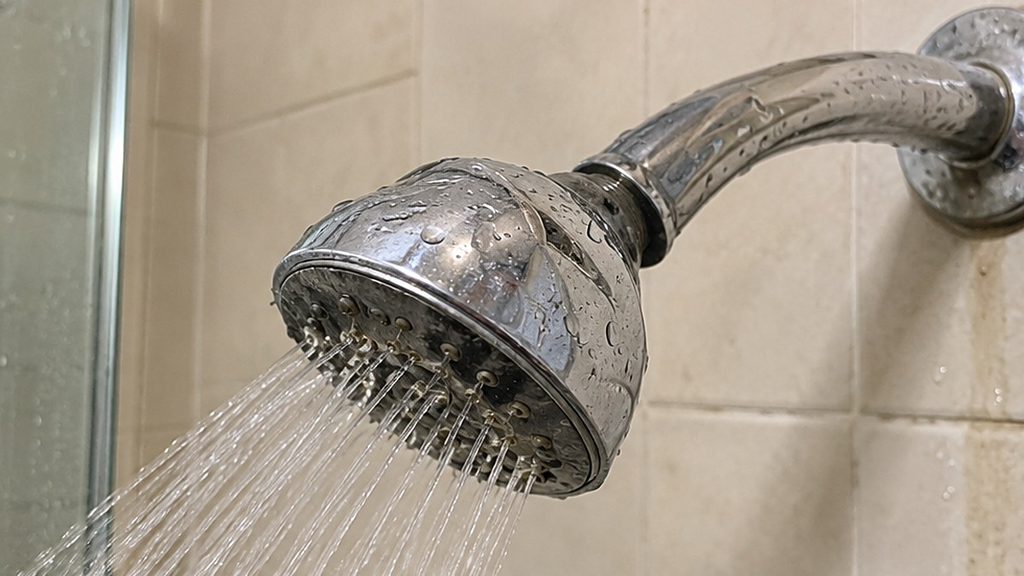
Check for cross-threading before tightening further. If tightening the shower head does not stop the leak, check whether its threads are aligned, because cross-threading keeps the connection from sitting evenly and can damage the fitting. Unscrew the head, inspect the threads and washer, and reinstall it carefully by hand. Avoid forcing or overtightening it, especially on plastic fittings.
Mistakes we recommend avoiding:
- Adding tape to every threaded connection.
- Using petroleum lubricants or unapproved sealants.
- Overtightening plastic collars or washer-sealed nuts.
- Altering flow restrictors or hose vacuum breakers.
When Should You Stop and Compare Local Plumbers?
We recommend calling a shower repair professional for water at or behind the wall flange, an arm that turns or wobbles, cracked fittings, failed shutoffs, valve drips you will not repair, or stacking that persists after checking the tub-spout setting.
Recognize Hidden Leaks, Loose Arms, and Failed Shutoffs
Damp drywall, staining, or moisture below the bathroom strengthens the case for a hidden leak that may need professional water leak detection. Stop using the shower until the water’s path is identified.
If a shutoff fails, keep fittings assembled and arrange prompt help. For uncontrolled water, close a safe, accessible main shutoff and call an emergency plumber.
Compare Review Evidence With Wise Workman
We score local plumbers on real homeowner reviews, and nobody can pay for a higher rank. When your leaking shower head needs professional attention, Wise Workman helps you compare plumbing professionals across all 50 U.S. states.
Our WW Score evaluates completion, professionalism, experience, and pricing using reviews from Angi, Google, Yelp, Thumbtack, and HomeAdvisor. We weight evidence and review coverage through our WW Score methodology; the result goes beyond star averages.
We screen for suspicious review patterns and investigate factual errors under our data-governance practices. Review narratives and update timestamps help you judge the evidence behind a listing.
Check Licensing, Insurance, and Written Repair Pricing
Verify licensing through the relevant state or local authority, and request current insurance information. Public profile details are a starting point for your checks.
Ask for written pricing that identifies diagnostic charges, parts, labor, and any wall-access work. Require approval before additional repairs, including work outside the original shower head complaint. When comparing shower repair quotes, confirm that each one covers the same problem and includes the same services.
What Should You Check During Routine Cleaning?
We recommend checking spray openings and accessible seals during routine cleaning, then watching the shower’s behavior after shutoff.
Inspect Nozzles, Connections, and Handheld Hose Washers
Look for mineral deposits around nozzles and fresh moisture at the arm connection. Flex a handheld hose gently during inspection to spot splits, keeping it free of sharp bends.
Inspect a rubber washer when its connection is already open for service. Add these observations to your home maintenance checklist without inventing a replacement schedule for sound seals.
Watch for New Drips After the Shower Is Off
Notice changes from the shower’s usual drainage pattern. A new persistent shower head leak deserves attention even when the spray still feels normal. Small drips add up: the EPA estimates that a showerhead leaking at 10 drips per minute wastes more than 500 gallons of water a year.
Record whether it happens after every use and where the water appears first. If moisture appears beyond the fixture, a plumbing inspection helps establish the repair scope.
Match the Repair to the Leak Before Replacing Parts
Our recommendation is to repair the component indicated by the leak’s location and timing. Accessible washer faults and approved cleaning belong at head level; ongoing shutoff drips need valve attention.
Keep the arm stationary, use model-matched seals, and follow the fixture’s tightening directions. After repair, check running connections and post-shutoff behavior before considering the job complete.
Frequently Asked Questions
Why does my new shower head drip when the water is off?
A new head holds water that drains after use. If dripping continues without tapering off, we recommend checking the shower control valve, because replacing the head leaves a valve-sealing fault unresolved.
Why is my shower head leaking at the base or connection?
A connection leak points to a misplaced seal, damaged mating surface, loose fitting, or incorrect thread sealing. We recommend drying the joint and locating the first wet spot before reopening it.
Do I need Teflon tape if my shower head has a rubber washer?
A washer-sealed connection commonly needs only its correctly seated washer. We recommend following the model’s instructions, since some heads specify tape at the shower-arm connection while hose ends use face seals.
What does a dripping shower head mean on a two-handle shower?
Persistent dripping indicates that a hot- or cold-side valve is failing to seal. We recommend identifying the valve design before ordering parts, since compression valves use seat washers while other designs use cartridges. Our guide on how to fix a leaky faucet explains how compression and cartridge designs differ.
Why is my shower head still dripping after replacing the cartridge?
Continuing drips point to retained water, debris at a seal, an incorrect or poorly seated cartridge, or damage in the valve body. We recommend confirming the exact replacement part and arranging a plumber if sustained dripping continues after installation checks.
How much does it cost to fix a leaking shower head?
A washer, O-ring, or thread-seal fix at the head usually costs only the replacement part. When the leak comes from the valve, our shower repair cost estimate puts a cartridge replacement at $100 to $350 and a full valve replacement at $225 to $575, with plumbers charging about $45 to $150 per hour.