To fix a leaky faucet, shut off the water, locate the leak, match the exact replacement part, replace the worn component, and gradually restore the supply to test. A dripping faucet wastes water and can cause hidden damage over time. Learning how to fix a leaky faucet begins with diagnosing the drip before buying parts. At Wise Workman, we also help you compare plumbers when the repair needs professional attention.
Our focus is kitchen and bathroom sink faucets. Tub/shower valves, outdoor spigots, electronic faucets, toilets, drain cleaning, supply-line or shutoff replacement, soldering, and full faucet replacement are outside this repair’s scope.
Stop and call a plumber if shutoffs fail, parts seize, the faucet body cracks, or water reaches the cabinet or wall.
Where Is the Faucet Leaking, and Which Design Is Inside?
The leak location identifies the part to investigate; the model’s repair sheet confirms the internal design. If you are dealing with an annoying dripping faucet, we recommend drying the fixture first so you can trace fresh water.
Match the Leak Location to Its Likely Cause
Watch with the faucet off, then briefly run it while checking the handle and base. Water travels along surfaces, so follow it to the highest wet point.
| Leak location | Likely cause | Repair direction |
| Spout drips while off | Worn washer, cartridge, seats, or disk seals | Identify the valve design |
| Handle or stem | Packing, stem seal, or cartridge seal | Inspect the model’s sealing parts |
| Swivel-spout base | Worn spout O-rings | Match the spout seal kit |
| Under the sink | Supply connection, hose, shutoff, or faucet leak | Locate the origin; supply and valve repairs need separate service |
A dry spout with a wet cabinet calls for closer inspection before you begin faucet repair.
Isolate the Leaking Side on a Two-Handle Faucet
Leave both faucet handles off and close one working under-sink shutoff. Let trapped water drain, then watch whether the drip stops.
If closing the hot supply stops it, investigate the hot-side valve. Reopen that supply and repeat with the cold side; both sides might need attention if each test reduces the drip.
Confirm the Internal Design Without Relying on Appearance
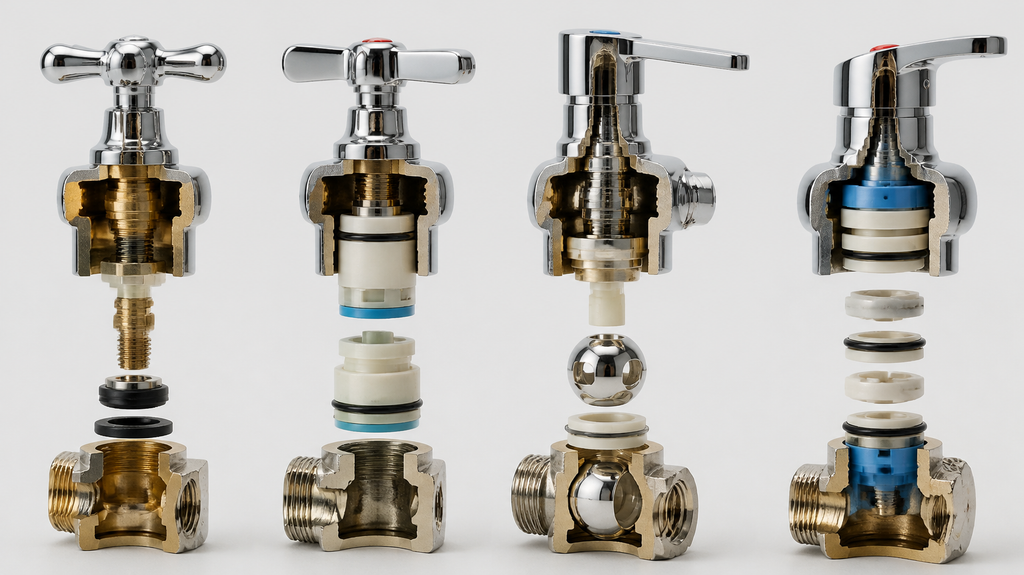
Handle count and exterior styling do not establish the mechanism. Confirm the design through the model’s parts diagram, then compare the exposed components after safe disassembly.
A compression faucet has a stem-mounted seat washer. A cartridge faucet uses a removable valve insert; a ball faucet has a rotating ball over seats and springs. A ceramic-disk faucet uses ceramic sealing surfaces, sometimes within a cartridge assembly.
Prepare Safely and Find the Exact Replacement Parts
Understanding how to fix a leaky faucet safely starts with proven water isolation and a model-matched parts plan. Keep the fixture assembled until you know how its retainers release.
Shut Off the Water, Relieve Pressure, and Protect the Drain
Close both shut-off valves using their intended operating motion without forcing them. Open the faucet through its hot and cold positions to release pressure; remaining pressure must be released before disassembly.
Wait for flow to stop completely. Plug the drain, place a towel beneath the workspace, and leave the faucet depressurized.
Keep the faucet open while you work. An open faucet holds the lines depressurized, and a trickle that never tapers off is a sign that a shutoff is still passing water. Stop and deal with the valve before taking anything apart.
Gather Tools and Photograph the Parts in Order
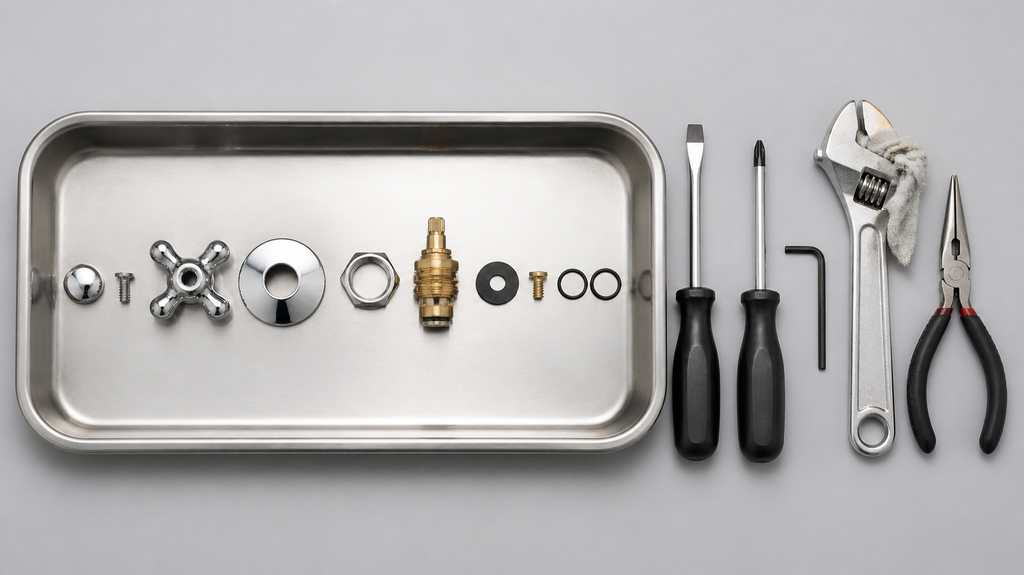
We suggest gathering tools before loosening anything:
- Screwdrivers and the correct hex key.
- An adjustable wrench and finish-protecting cloth.
- Needle-nose pliers, if the retainer requires them.
- A flashlight, parts tray, towels, and exact replacement parts.
- A manufacturer-specified puller, when required.
- Compatible silicone plumber’s grease, only if approved.
Photograph each exposed layer before removing it. Arrange parts in removal order, keeping hot-side and cold-side components separate.
Find the Brand, Model, Repair Sheet, and Warranty Coverage
Look for markings on the handle, spout, underside, or supply-line tag. Use the manufacturer’s identification tools or send its support team clear photos before ordering.
Match the part number, cartridge length, and stem end. Similar-looking inserts have different ports and retainers. Review warranty eligibility before buying; check original-owner requirements, proof of purchase, parts coverage, and labor exclusions.
Cartridges are not interchangeable across brands, and often not across models from the same brand. When a faucet carries no usable markings, shut off the water, remove the old cartridge, and match it in person at a plumbing supply counter instead of ordering from a photograph.
Replace Worn Parts According to the Faucet’s Internal Design
The correct repair replaces the failed seal or valve component using the exact-model procedure. We recommend keeping the water off throughout disassembly and reassembly.
Compression Faucet: Replace the Seat Washer or Stem Seal
Remove the handle and stem assembly using the repair sheet’s sequence. A spout drip points toward the seat washer or its sealing surface; a handle leak points toward stem packing or a stem seal.
At the bottom of the stem, a screw holds the rubber washer in place. Fit the specified washer size and profile, then secure it as directed.
Inspect the washer before concluding that the faucet itself has failed. The flat or beveled rubber seats against the valve body, and age and overtightening both cut grooves into it. A drip that looks like a worn-out faucet is often a washer that costs a few cents to replace.
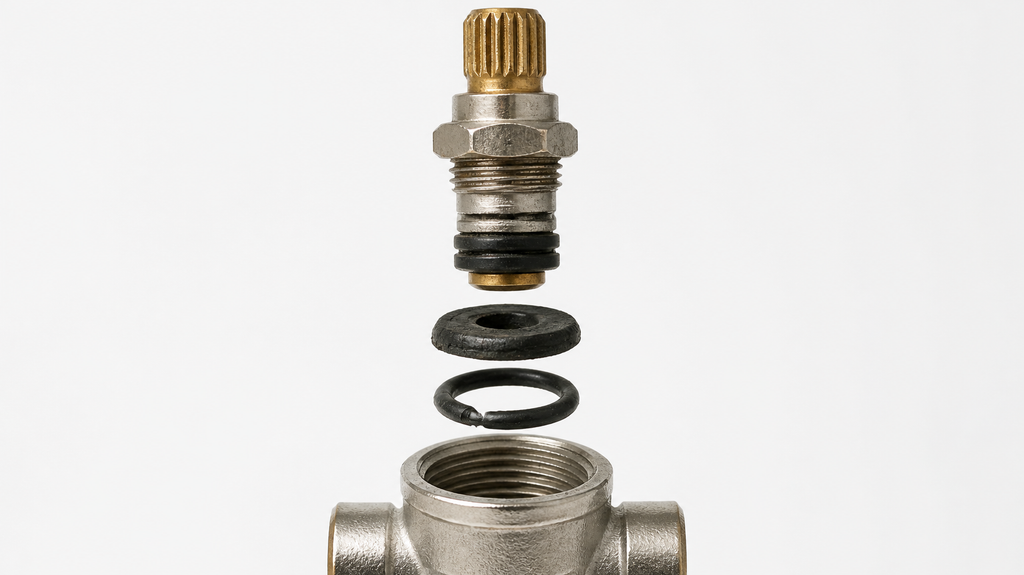
Inspect the seat for pitting and the stem for damaged threads. A leaking packing nut needs the model’s approved adjustment or packing repair; avoid tightening it until the handle binds. Leave seat dressing or removal to a qualified plumber when the procedure is unclear.
Cartridge Faucet: Match the Retainer and Preserve Cartridge Orientation
Photograph the cartridge’s position and mark its orientation before removal. Retainers include clips, bonnet nuts, and threaded caps; each requires a different release method.
Remove the specified retainer, then extract the cartridge with the approved tool. Stop if it resists beyond the manufacturer’s instructions. Prying against the faucet body risks permanent damage.
Seat the exact replacement with its tabs and ports aligned. Restore the retaining hardware fully before reconnecting the handle; incorrect orientation causes reversed hot and cold operation on some models.
Ball Faucet: Replace Model-Specific Seats, Springs, and Seals
Remove the handle, cap, cam, and ball in the documented order. Photograph the spring direction and each seat’s position before lifting them out.
Install the exact-model seats and springs, plus any specified cam seals. Inspect the ball for scoring and replace it if the manufacturer directs. Align its locating feature during assembly, then adjust cap tension only as instructed.
A universal kit risks mismatched spring shape or seal dimensions. Use the faucet’s part numbers when selecting replacements.
Ceramic-Disc Faucet: Service Approved Inlet Seals or Replace the Cylinder
Lift out the cylinder or cartridge using its specified fasteners and removal method. Some designs have serviceable neoprene seals at the inlets; others require replacement of the complete valve assembly.
Replace inlet seals only when the repair sheet authorizes that work. Keep sealing surfaces clean, and use approved descaling methods only. Abrasives and unapproved chemicals damage precision surfaces.
Match the complete cylinder by part number if replacement is required. Ceramic-disc assemblies and other cartridges need their own specified parts and installation procedures.
Restore Water and Check Whether the Repair Worked
A successful faucet repair stays dry both during use and after shutoff. We recommend checking every disturbed connection before putting supplies back under the sink.
Reopen the Supply Gradually and Test for Drips
Set the faucet handle as directed for startup, then reopen the supplies slowly while watching for leaks. Flush using the manufacturer’s procedure, including aerator removal when specified.
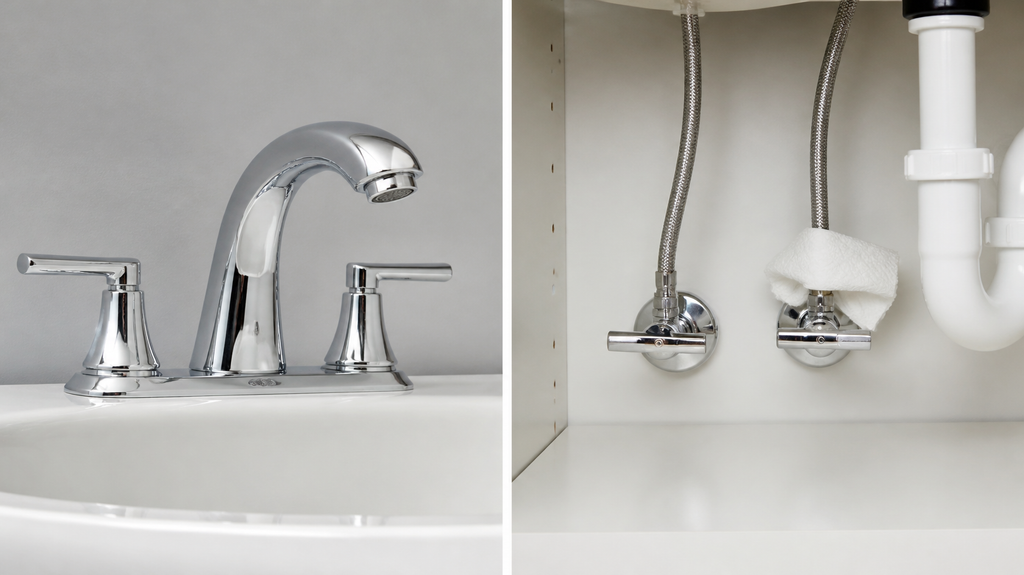
Test cold, hot, and mixed flow, then turn the faucet off. Check the spout after residual water drains, and press dry tissue around handles and connections to reveal seepage. On applicable single-handle models, testing begins with cold-water operation.
Avoid Repair Mistakes That Damage Seals or Faucet Bodies
A fresh seal still needs correct seating and assembly. We recommend avoiding these common mistakes:
- Forcing or heating seized components.
- Overtightening screws, caps, or packing nuts.
- Applying petroleum lubricants or unapproved cleaners.
- Adding thread tape to connections that seal with washers or O-rings.
- Lubricating ceramic surfaces without approval.
- Reopening water before retainers are fully secured.
Use silicone plumber’s grease only where the manufacturer permits it. A thin approved coating on an O-ring serves a different purpose from filling a valve cavity with grease.
Inspect the Faucet and Under-Sink Area Seasonally
Add a faucet check to your seasonal home maintenance checklist. Inspect aerators, handle and spout bases, hoses, and under-sink connections while the water runs.
Check again after shutoff, then look for cabinet stains or swelling. Recurring moisture beyond the fixture warrants a plumbing inspection to identify the underlying problem.
When Should You Stop and Compare Local Plumbers?
Stop DIY work when safe isolation or controlled disassembly is no longer possible. Your observations still help a plumber identify the repair and prepare suitable parts.
Recognize Failed Shutoffs, Seized Parts, Cracks, and Persistent Leaks
Arrange professional help for:
- Shut-off valves that pass water or leak when operated.
- Seized, corroded, or stripped components.
- Cracks in the faucet body.
- Water inside cabinets or walls.
- Persistent leaks after correct-part installation.
A stem that will not turn calls for the right tool rather than more force. Reach for a deep-well socket on an 18 to 24 inch handle and a penetrating oil such as Liquid Wrench, since the sockets sold for stem removal can slip and round off the stem nut. Brass valve bodies rarely break during stem removal, but one that was never secured properly during installation can shift in the wall under that torque, and that is the point to stop and call a licensed plumber.
For uncontrolled water, close a known, accessible main shutoff if safe and contact an emergency plumber. Keep water away from electrical equipment.
Compare Review Evidence With Wise Workman
We score local plumbers on real homeowner reviews, and nobody can pay for a higher rank. Wise Workman covers plumbing professionals across all 50 U.S. states.
Our evidence-sensitive rankings assess completion, professionalism, experience, and pricing separately. Review coverage includes Angi, Google, Yelp, Thumbtack, and HomeAdvisor.
Our WW Score methodology explains how review volume and dimension coverage influence rankings beyond star averages. Our data governance practices explain review handling and factual corrections.
Check Licensing, Insurance, and Written Pricing Before Hiring
Verify licensing with the relevant state or local authority and request current insurance documentation. Our profiles include licensing and insurance status where publicly available; independent checks remain part of your hiring decision.
Request written pricing that identifies diagnostic fees, parts, labor, and approval requirements for extra work. When comparing faucet repair costs, confirm that each estimate covers the same problem and includes the same services.
Match the Part, Test the Seal, and Know When to Get Help
The right repair starts with a confirmed leak location and an exact-model part. We recommend keeping your photos and part number until the faucet passes both running-water and shutoff checks.
If the leak continues, leave the supply safely isolated and share those details with a plumber. Include where the water appears and which components you replaced.
Frequently Asked Questions
Can I fix a dripping sink faucet myself?
Yes, if both shutoffs work and the worn part is accessible with the specified tools. We recommend professional help when corrosion or resistance makes removal uncertain.
Can I fix a leaky faucet without replacing the cartridge?
Yes, when the failed component is a serviceable washer, spout O-ring, or approved seal. On some models, under-handle leaks require model-specific sealing repairs; we recommend confirming the failed part before ordering a cartridge.
Why does my faucet still drip after I turn off the shutoff valves?
Residual water drains briefly, but continued dripping indicates incomplete isolation or another connected water path. We recommend leaving the faucet assembled until the supply is safely isolated.
Can I repair a leaky faucet without tools?
Most internal faucet repairs require tools to remove handles and retainers safely. We recommend gathering the specified tools first; improvised gripping tools damage finishes and fasteners.
Why does my faucet still leak after I replace the correct part?
Debris, a pinched seal, incorrect orientation, or a damaged sealing surface can leave the leak unresolved. We recommend checking assembly against the exact-model diagram with the water off, then getting professional help if the leak persists.