Metal roofing is popular for its durability, longevity, and aesthetic appeal. It is commonly used in residential, commercial, and industrial roofing applications. However, cutting is often required to fit and install metal roofing sheets precisely.
Cutting metal roofing is a fundamental task in roofing projects to achieve a successful and durable result. It allows for customization, obstacle navigation, and the achievement of unique designs while ensuring safety, efficiency, and the long-term performance of the roofing system.
Are you wondering how to cut metal roofing? Keep reading for a step-by-step guide to help answer all your questions.
Safety Precautions for Cutting Metal Roofing
Although working with metal roofing materials can be enjoyable, there are a number of safety issues to be aware of. The importance of safety must be emphasized at all times in order to guarantee a successful and secure project.
Safety Precautions for Metal Roofing:
Risk Assessment: Perform a complete risk analysis before beginning any project using metal roofing. Determine any dangers that might exist, such as electrical cables, sharp edges, and unstable surfaces.
Plan Your Work: Create a thorough work plan that outlines your tasks, a timeframe, and safety precautions. A detailed plan will keep you organized and reduce hazards.
Weather Awareness: Pay attention to the weather. Rain or snow-covered areas that are slick might raise the danger of accidents. Before working on a metal roof, always check the weather forecast.
Education and Information: You should make sure that everyone on your team has the training and expertise required to work with metal roofing materials. This involves being aware of safe tool and equipment handling techniques.
Protective Gear for Metal Roofing:
Head Protection: Work on the roof while wearing a strong hard hat to protect your head from flying debris or unintentional bumps.
Eye Protection: When cutting or installing metal roofing, safety goggles or a full-face shield are needed to protect your eyes from dust, sparks, and UV rays.
Hearing Protection: Protect your hearing from the loud noises made by metal roofing tools by wearing earplugs or earmuffs.
Respiratory Protection: Use a respirator mask when cutting or welding metal to protect your lungs from dangerous gases and dust.
Gloves: Premium gloves with high grip are essential for handling metal roofing components safely. Your hands are shielded from cuts and jagged edges by them.
Safe Metal Roof Cutting:
Proper Tools: Use the proper equipment for the work, such as shears for cutting metal or nibblers for cutting roofing materials.
Secure Footing: Make sure you have a solid foundation on the roof. Use a fall protection system, safety harnesses, or roof jacks when necessary.
Secure Materials: To prevent shifting or falling as you work, securely fasten the metal roofing materials.
Bystander awareness: Before cutting metal roofing, be sure nobody is nearby. Work with your team to prevent accidents through communicating.
When working with metal roofing materials, safety must always come first. Lower the chance of accidents and guarantee a successful and injury-free metal roofing job by adhering to safety precautions, wearing the necessary protective gear, and using safe work procedures.
To fully enjoy the advantages of working with metal roofing materials, safety should always come first.
Tools and Equipment Required to Cut Metal Roofing by Hand
In order to provide accurate, clean cuts and a safe working environment, cutting metal roofing requires the proper tools and equipment. Circular saws, nibblers, and tin snips are among the essential instruments for cutting metal roofing.
This section will also offer advice on choosing the best tool for your project.
Circular Saws for Metal Roofing
Tools like circular saws are adaptable and may be used for a variety of cutting jobs, including those involving metal roofing.Select a circular saw with a metal-cutting carbide-tipped blade.
To keep a clean cut and match the metal's thickness, ensure the saw has a variable speed control.Use a straight-edge guide or a square to create straight, accurate cuts with a circular saw.
When utilizing circular saws for metal roofing, make sure always to wear the proper protective gear, including eye and hearing protection.
Nibblers for Metal Roof Cutting
Nibblers are unique instruments made just for cutting sheet metal, which makes them perfect for metal roofing. They punch a succession of quick, exact cuts into the metal, resulting in the least waste and distortion.
For versatility in a range of roofing settings, nibblers come in corded and cordless versions.Make sure the cutting capacity of the nibbler corresponds to the thickness of the metal roofing you are using.
Intricate patterns and curved cuts benefit greatly from nibblers.
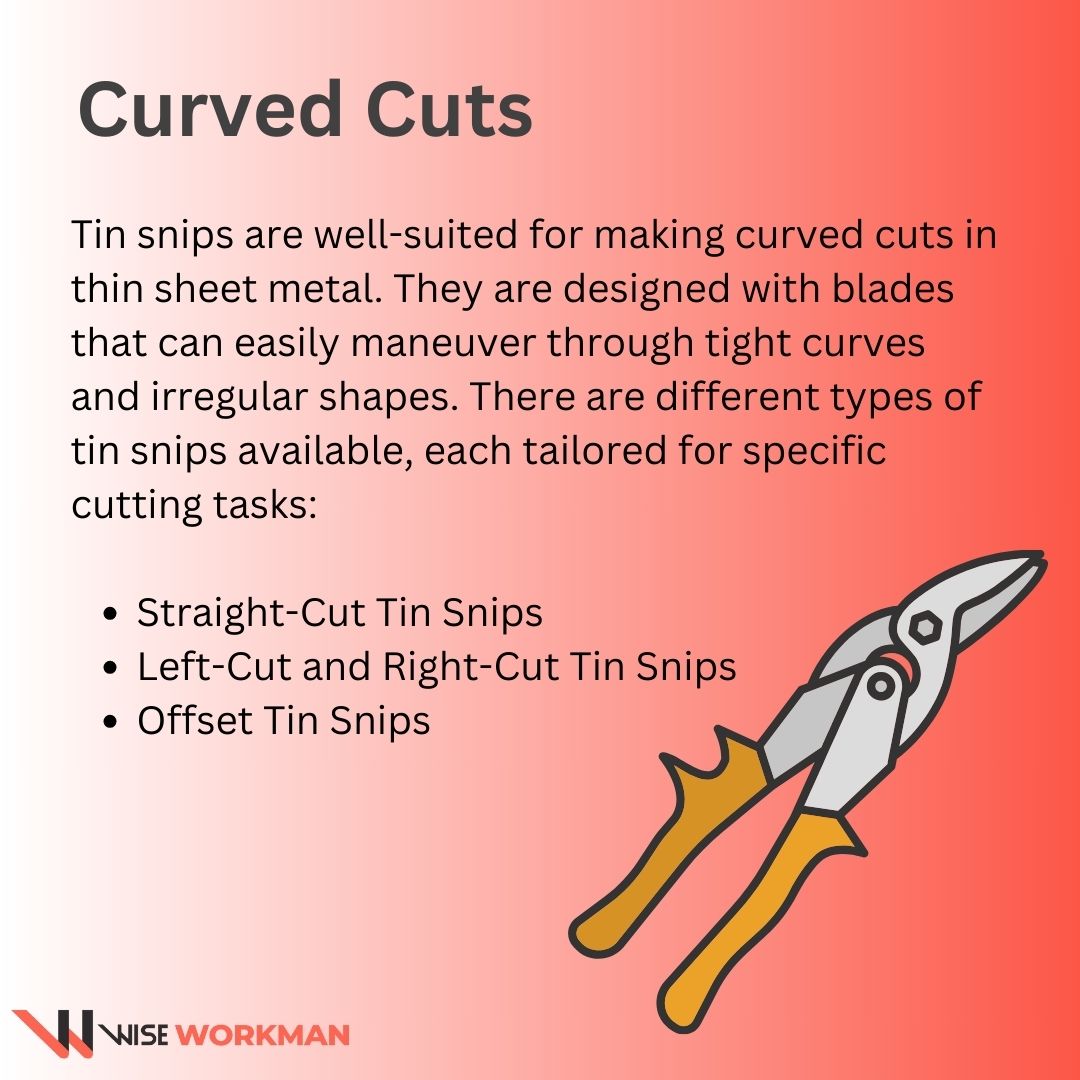
Tin Snips for Cutting Metal Roofs
Tin snips are portable, serrated-jawed cutting implements ideal for slicing thin-gauge metal roofing.They are available in a variety of forms, including straight-cut, left-cut, and right-cut snips, each of which is made for a particular cutting direction.
Tin snips work well for making precise, little cuts like trimming around vents or flashing.For precise, effective cuts, regularly sharpen and maintain your tin snips.
Tin snips need to be used carefully and with caution because they need to be physically used to cut through metal.
Selecting the Right Tool
Consider the kind and thickness of the metal roofing material you are using. Stronger tools like circular saws or nibblers could be needed to work with thicker materials.
Analyze how complex your cutting requirements are. A circular saw may be adequate for straight cuts, while nibblers and tin snips are more suited for curved or complicated cuts.
Regardless of the tool you select, be sure you have the necessary safety equipment, such as gloves, eye protection, and hearing protection.
The appropriate tools must be used to cut metal roofing accurately, safely, and effectively. To choose the right instrument, thoroughly consider your project's requirements. Circular saws, nibblers, and tin snips each offer specific advantages.
Preparing the Work Area to Start Cutting Corrugated Metal Roof
Cutting metal roofing sheets requires a secure and well-organized work area. In addition to guaranteeing the caliber of your job, this also assures both your safety and the safety of others.
We'll give you detailed instructions on how to set up your workspace so that you may cut metal roofing sheets later on in this guide.
Location and Environment: For your workspace, pick a flat, secure place like a rooftop or a sturdy scaffold. Make sure the area is clear of any tools, debris, and other potential trip hazards.
Take the weather into consideration: Avoid operating in inclement weather or strong gusts that could compromise your stability and safety.
Safety Equipment and Gear: Make wearing personal protective equipment (PPE), including gloves, safety glasses, hearing protection, and proper footwear a priority. In case of small injuries, keep a first aid package close at hand. If operating at heights, use fall safety tools like harnesses and lifelines.
Tool and Material Organization: To decrease movement and lower the chance of accidents, arrange your tools and materials.To avoid trip hazards, place equipment in a designated area while not in use. Maintain orderly stacks of metal roofing sheets to prevent movement or falling.
Work Space Layout: Establish distinct zones for cutting, tool storage, and trash disposal when marking out your cutting area. Make sure your workspace has enough illumination for visibility, especially if you're working in low light. Keep the workspace well-lit for simple access and movement.
Fire Safety: Especially if you are working in a location with combustible materials, keep fire extinguishers close by. A fire-resistant blanket or welding curtain should be available if necessary. Keep open flames and sparks away from dangerous things.
Waste Disposal: Establish a special location for the collection of garbage and metal scraps. To avoid damage from sharp edges, dispose of waste in the proper containers.
Emergency Procedures: Your crew should be informed of emergency protocols, including how to handle accidents and injuries. Make sure everyone is aware of where the first aid kits are located and who to contact in case of an emergency.
For your project's success and everyone's safety, setting up a secure and well-organized work area is crucial. You may reduce risks, improve productivity, and make sure that things run smoothly and securely at work by adhering to these rules.
When dealing with metal roofing sheets, put safety, organization, and preparation first to get the most remarkable results.
Choosing the Right Cutting Method (Best way to cut metal roofing)
Choosing the right technique for cutting metal roofing is essential for obtaining exact results while reducing waste and potential risks.
The various techniques for cutting metal roofing, such as utilizing snips, a circular saw, or a nibbler, as well as when to use each technique, are covered below:
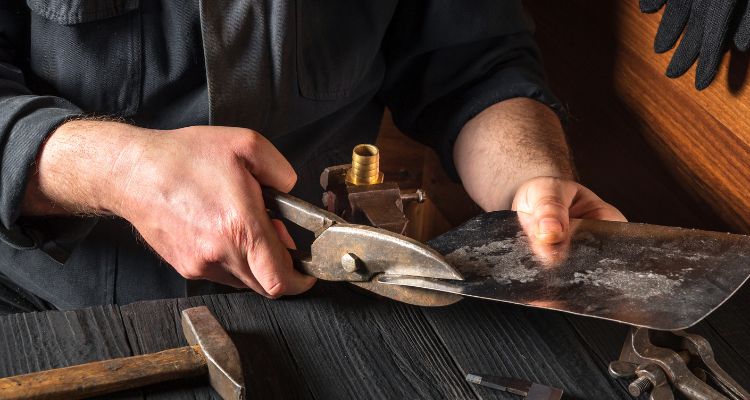
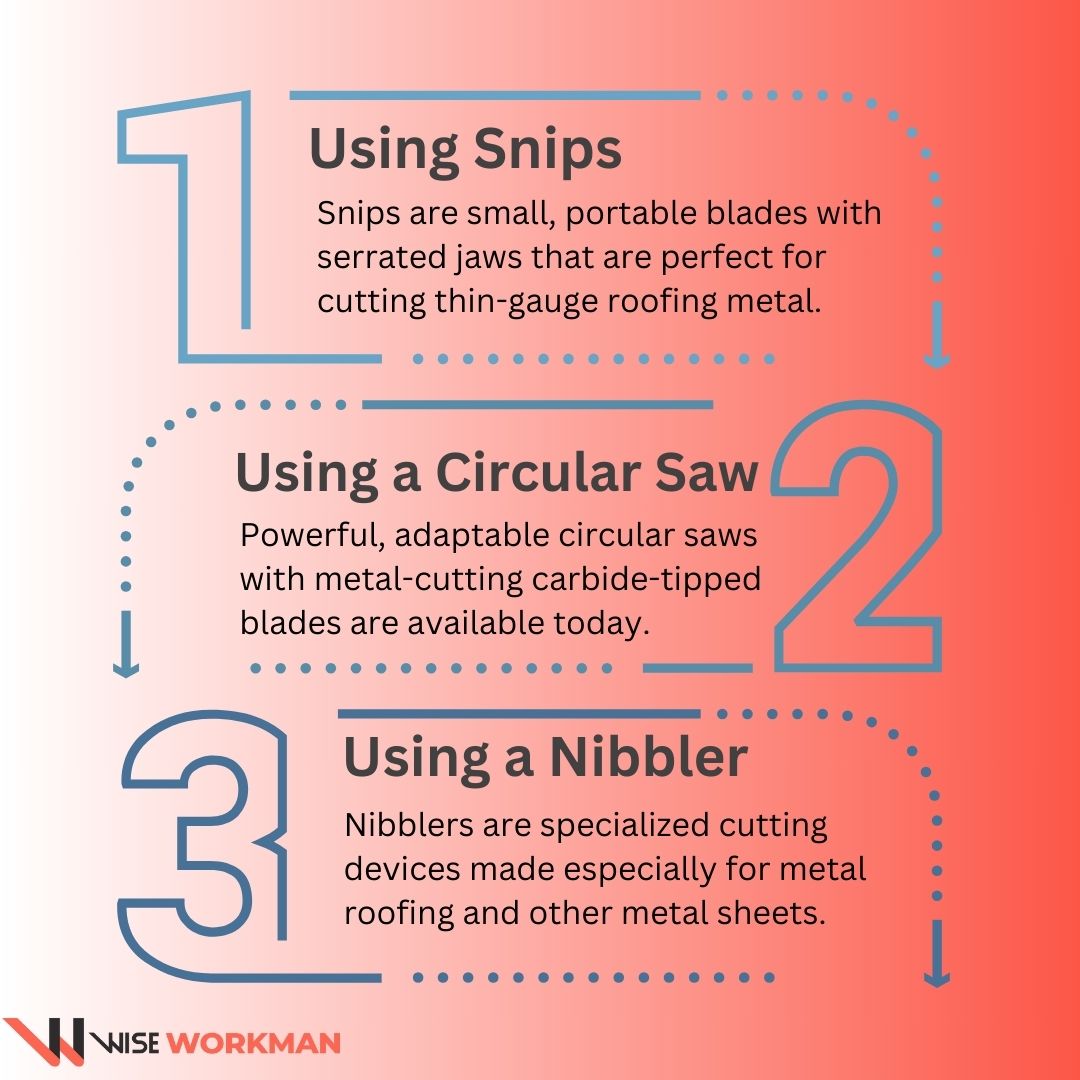
1. Using Snips: Snips are small, portable blades with serrated jaws that are perfect for cutting thin-gauge roofing metal.
When to Use: Use snips for precise, little cuts such as trimming around skylights, vents, or flashing.Snips are ideal for cutting complicated shapes with curves, such as circles or arcs. It is ideal for circumstances requiring the most significant amount of control and accuracy.
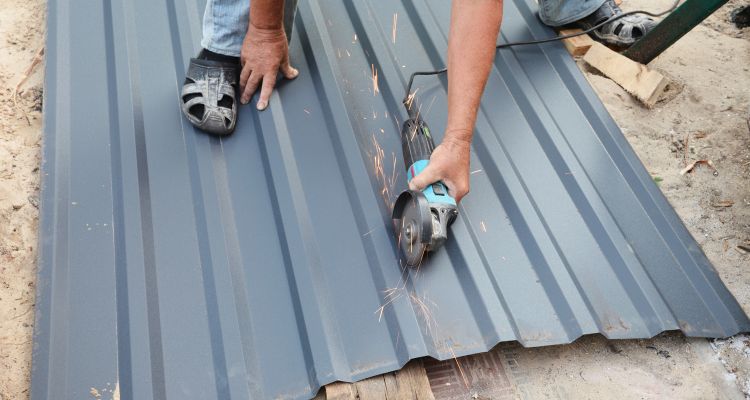
2. Using a Circular Saw: Powerful, adaptable circular saws with metal-cutting carbide-tipped blades are available today.
When to Use: When you need to cut long, straight pieces of metal roofing, use a circular saw.Cutting through heavier metal roofing materials with ease. It is most effective for jobs that call for quickness and efficiency.
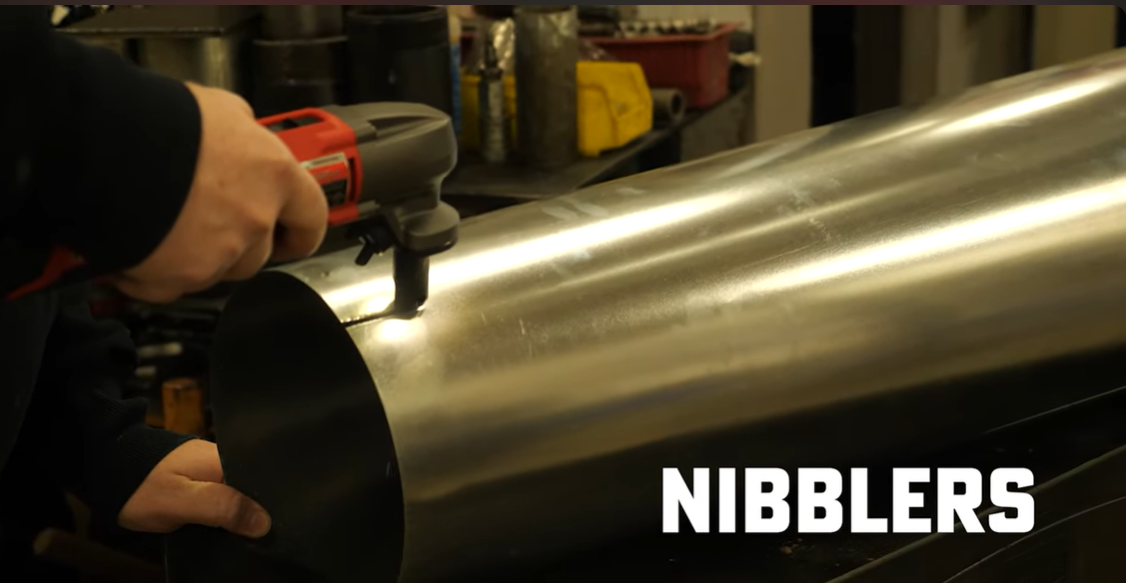
3. Using a Nibbler: Nibblers are specialized cutting devices made especially for metal roofing and other metal sheets.
When to Use: When you need to make accurate, waste-free cuts, choose a nibbler. Nibblers are skilled in cutting intricate patterns, curves, and complicated shapes. It is ideal for situations where minimizing metal deformation or distortion is essential.
Factors to Consider When Choosing a Tool to Cut Metal Roof:
Material Thickness: Take into account the metal roofing sheets' thickness. While snips work well for thinner sheets, a circular saw or nibbler may be needed for thicker materials.
Cut Complexity: Assess the degree of difficulty of your cuts. Intricate shapes can be cut most precisely with snips, whereas straight and curved cuts work best with circular saws and nibblers.
Efficiency: A circular saw may be the most effective tool for huge jobs that need straight cuts. You might be slowed down in these situations by nibblers and snips.
Safety First: Make sure you are knowledgeable and at ease using the cutting technique you have chosen. Always put your own safety first.
Choosing the appropriate metal roof-cutting technique is crucial for reaching your goals quickly and safely. The choice of snips, a circular saw, or a nibbler relies on the thickness of the material, the complexity of the cut, and your level of tool comfort.
Hire a Professional to Cut Metal Roof
Although DIY projects can bring a feeling of achievement, there are some instances where hiring a professional to do the job is the smarter road to take, and having your metal roof cut is one of those instances.
Let us walk you through the different advantages that come with choosing a professional to do your metal roof cutting:
Safety: Professionals have received the appropriate training in safety procedures and personal protective equipment (PPE) to reduce risks. Diverse risks are present when cutting metal roofing, but specialists are aware of efficient ways to reduce them.
Precision: Professionals are skilled at making exact cuts, guaranteeing that the roofing material fits well and lowering the possibility of leaks or structural problems.
Proper Tools: Professionals have access to the proper equipment, such as safety gear and high-quality metal cutting tools. This guarantees that the work is completed successfully and efficiently.
Time-Efficiency: Due to their competence, professionals operate fast and effectively, potentially saving you time and enabling the smooth completion of your roofing job.
Reduced Waste: By making precise cuts, experts can reduce material waste and help you save money on roofing supplies.
Compliance: Roofing specialists are knowledgeable about regional construction rules and codes. They can guarantee that the cutting and installation adhere to all necessary specifications.
Insurance and Liability: Liability insurance, which offers protection in the event of mishaps or damage during the project, is often carried by professionals. You run the risk of losing this protection if you try to do the work yourself.
Quality Assurance: Employing an expert guarantees the caliber of the work, lowering the possibility of mistakes that could result in pricey future repairs.
Customization: To create unique design aspects in your roof, professionals can manage intricate cutting needs, like curved cuts or cutting around obstacles.
Peace of Mind: Being at ease and avoiding potential DIY hassles might come from knowing that your roofing project is in qualified hands.
Therefore it is a worthy investment in the long-term performance and durability of your roof, hiring a roofing specialist ensures safety, accuracy, compliance, and project success.
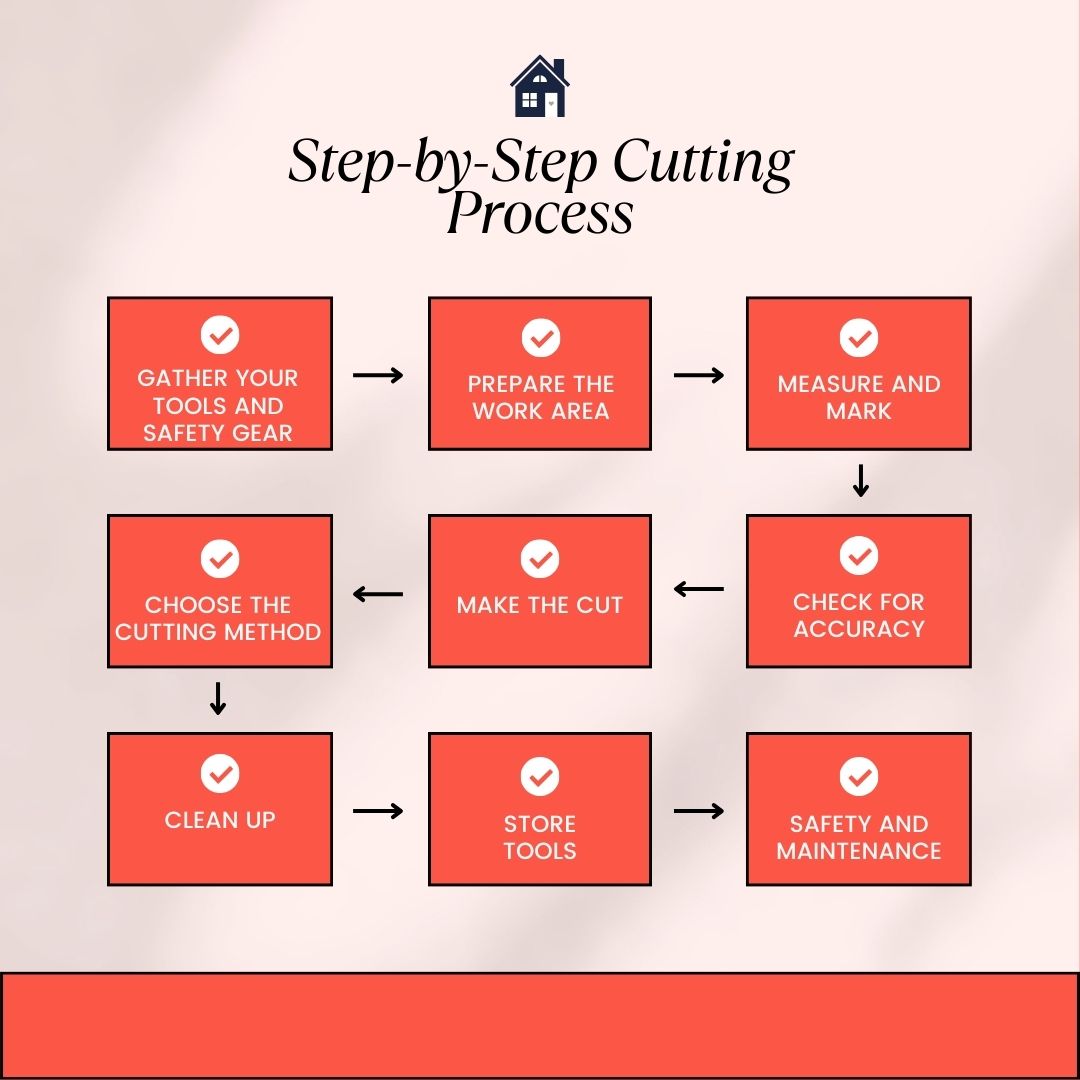
Step-by-Step Cutting Process
A good roofing project requires precise and safe cutting of metal roofing. This step-by-step description will take you through the procedure and provide advice on how to make straight, accurate cuts while putting safety first.
Step 1: Gather Your Tools and Safety Gear
Make sure you have the appropriate tools, such as snips, a circular saw, or a nibbler, depending on the specifications of your project.
Put on the necessary personal protective equipment (PPE), such as gloves, safety glasses, hearing protection, and appropriate clothing.
Step 2: Prepare the Work Area
Debris, tools, and potential trip hazards should all be removed from the work area.
If utilizing power tools, set up your workspace with a level, solid surface, suitable lighting, and access to power.
Step 3: Measure and Mark
Measure and mark the cutting line on the metal roofing sheet using a straight edge, chalk, or a pencil.
Use a square to ensure your cutting line is straight and square to the roofing sheet.
Step 4: Choose the Cutting Method
Select the appropriate cutting method based on the type of cut needed:
Snips for detailed, curved, or intricate cuts.
Circular saw for long, straight cuts.
Nibbler for precise, clean cuts with minimal distortion.
Step 5: Make the Cut
For Snips:
Insert the blades into the metal along the marked cutting line. Squeeze the handles together to cut, maintaining steady pressure for a clean cut. Keep your hand and body positioned safely away from the cutting path.
For Circular Saw:The circular saw should be set up with a metal cutting blade. Start the saw after lining up the blade with the marked cutting line. Guide the saw slowly along the line while keeping a tight grip and a constant speed. To avoid the material warping or bending during the cut, make sure it is solidly supported.
For Nibbler:At the beginning of the marked line, lace the cutting head of the nibbler.To start the cut, lightly press the handles of the nibbler.Follow the drawn line as you gnaw through the metal in little sections. Pay heed to the nibbler's indication of the cutting path.
Step 6: Check for Accuracy
After cutting, inspect it to ensure it meets your accuracy requirements.
Use a file or deburring tool to smooth any sharp edges or burrs.
Step 7: Clean Up
Remove any metal scraps and waste materials from the work area and dispose of them safely.
Step 8: Store Tools
Safely store your cutting tools in their designated area, out of reach of children and unauthorized personnel.
Step 9: Safety and Maintenance
Regularly inspect and maintain your cutting tools to ensure they remain in good working condition.
Always follow safety protocols, and never leave tools unattended.
These step-by-step instructions will help you securely and accurately cut metal roofing. A successful roofing project requires careful planning, accuracy, and adherence to safety precautions, whether you use snips, a circular saw, or a nibbler. Remember that your cutting abilities will improve with time and practice.
Dealing with Special Situations
Cutting metal roofing can be particularly difficult when having to deal with curved cuts or cutting around obstructions. We'll review safe and efficient ways to address these unique circumstances in this part of the article.
1. Curved Cuts:
a. Using Snips:
Make a series of short, angled cuts along the curved line before the final curved cut.
Follow your indicated line as you gradually make your way around the bend.
Use the snips' tips to retain control and maneuver around tight turns.
b. Using a Nibbler:
Start by drilling a hole at the location where the curved cut first began.
Follow the specified curve after inserting the cutting head of the nibbler into the hole.
Continue gnawing away at the metal while applying constant pressure.
Nibblers are skilled at cutting curves precisely and with little distortion.
c. Template Method:
Create a cardboard or plywood template of the desired curve.
Place the template on the metal roofing sheet and trace the curve onto the metal.
Cut along the marked line using snips or a nibbler, following the template's curve for accuracy.
2. Cutting Around Obstacles:
a. Marking and Planning:
Measure the size of the obstruction on the metal roofing sheet carefully.
On the sheet, indicate the dimensions and the area that needs to be cut off.
b. Snips or Nibbler:
To make precise cuts around tiny obstructions, use snips or a nibbler.
Make a hole close to the indicated area's edge to start, then carefully and precisely cut along the lines.
c. Circular Saw with Metal Cutting Blade:
A circular saw with a metal-cutting blade might be more effective for bigger obstructions.
Create a rectangle or square hole by making straight cuts along the lines that have been defined.
To complete, cut the corners to the desired shape.
d. Safety Precautions:
To prevent damaging the roofing material or the obstruction itself, use caution when cutting around impediments.
To avoid movement or mishaps, make sure the obstruction is firmly secured in place during the cutting operation.
3. Safety Considerations:
When tackling unique scenarios, safety should always come first, and that includes wearing the proper PPE.
To prevent mishaps, keep hands and other body parts away from the cutting path.
Observe the manufacturer's instructions for the particular cutting tool you are using.
4. Practice and Precision:
Special circumstances frequently call for a higher degree of dexterity and competence.
Before attempting curved cuts or cutting around obstructions on your actual roofing material, practice on scrap metal.
When dealing with metal roofing, handling curved cuts and cutting around obstructions calls for careful preparation, the appropriate tools, and precision.
Put safety and precision first whether you're using snips, a nibbler, or a circular saw. You may effectively manage these unique challenges in your roofing job with practice and the right techniques.
Finishing and Safety Checks
After cutting metal roofing, finishing the edges and performing safety inspections is essential to guarantee a secure installation.
Let us go through the significance of these post-cutting activities in this manual and how they affect the overall standard and safety of your roofing project.
1. Edge Finishing:
a. Preventing Corrosion:
Metal edges that need to be completed are prone to rust, which could jeopardize the durability of the roofing material.
Applying the proper edge treatment, such as primer or paint, aids in preventing rust and Corrosion on the cut edges.
b. Enhancing Aesthetics:
Your metal roofing will look neat and professional with finished edges.
Well-maintained edges help your roof's overall aesthetic appeal.
c. Maintaining Longevity:
Finished edges increase their longevity because they stop moisture from entering and damaging your metal roofing.
A well-finished edge aids in preserving the roofing material's structural integrity over time.
2. Safety Checks:
a. Sharp Edges and Burrs:
After cutting metal roofing, look for any burrs or rough edges on the cut edges.
To avoid injury during installation and maintenance, smooth down any sharp points with a file or a deburring tool.
b. Secure Fasteners:
Verify the tightness of all the fasteners used to join the metal roofing sheets.
In addition to posing a threat to safety, loose fasteners can cause leaks or instability in the roof.
c. Fall Protection and Anchorage:
Check to make sure that any fall protection equipment you've been using is securely anchored if you've been working at heights.
Verify that safety rails, lifelines, and harnesses are in good shape and ready for use.
d. Roof Integrity:
Make sure that the roof's structural integrity is not jeopardized by the cutting procedure by performing a visual check of the entire structure.
Examine the metal roofing sheets for any indications of buckling, warping, or misalignment.
3. Quality Assurance:
a. Documentation:
For future reference, keep a record of the finishing procedures used on the cut edges.
Keep records of safety inspections, including dates and any corrective actions that were performed.
b. Compliance:
Make sure your roofing project conforms with all applicable safety and building rules in your area.
For your installation to be safe and legally sound, compliance is crucial.
c. Professional Inspection:
Consider hiring a qualified roofing inspector to examine the finished project and certify its quality and safety.
An additional layer of assurance that your installation is safe and compliant with regulations is added by professional inspection.
A secure and safe roofing installation is ensured by completing metal roof cuts with proper edge finishing and performing safety checks.
These post-cutting precautions not only prolong the lifespan and visual appeal of your roof but also reduce safety hazards and guarantee legal compliance. To complete a high-quality and secure metal roofing project, give these steps priority.
Conclusion
To summarize how to cut metal roofing it is critical to adhere to safety precautions and select the appropriate tools. Safety is paramount in metal roofing projects, necessitating thorough risk assessments, careful planning, and proper training for all team members.
Essential personal protective equipment (PPE) like safety goggles, hearing protection, gloves, and suitable footwear should always be worn. The choice of cutting tools, including circular saws, nibblers, or tin snips, should align with the project's specific needs and materials.
These tools must be maintained and used correctly to minimize the risk of accidents during cutting. Post-cutting measures such as edge finishing and safety checks are equally crucial, ensuring smooth edges, corrosion prevention, and compliance with regulations.
By prioritizing safety and tool selection, you not only create a secure working environment but also guarantee the success and durability of your metal roofing endeavor.
 Author: Howard Griner | Updated on January 11, 2024