How to Install Cabinet Hinges? A DIY Guide
 Author: Howard Griner | Updated on March 6, 2024 Author: Howard Griner | Updated on March 6, 2024
Welcome to our guide on how to install cabinet hinges where we will help you carry out your DIY project if you are starting from scratch!
Cabinets are essential for storage, be it in kitchens, living rooms, or bathrooms. The routine use of cabinets in our daily lives requires us to withstand the repetitive closing and opening. The cabinet’s functionality is determined by the type and the quality of the hinges used.
Before starting the process of hinge installation, you should be aware of the entire process. In this blog, we will help you understand cabinet hinge installation and the materials and tools required.
Follow our guide to attain a polished and clean look for your cabinets. With professional tips and tricks, you can avoid some common mistakes in hinge installation.
Keep reading!
Cabinet hinges are responsible for the cabinet’s smooth operation, allowing it to open and close easily. If you are looking for convenient access to the cabinet’s contents stored inside, you need well-installed hinges to fulfill the purpose.
In addition to smooth operation, cabinet hinges are important in ensuring security. They have to be properly installed which keeps cabinet doors securely closed and safeguards valuables inside.
Another reason to install cabinet hinges is to invest in hinges with self-closing mechanisms. These are safe to use with children and they prevent the doors from accidentally swinging open or closing shut too quickly.
Here, we have a list of essential tools and materials for cabinet hinge installation. With a complete hinge installation kit, you can easily carry out a DIY project to install cabinet door hinges.

Let’s look at what you should be investing in.

When you go to a hardware store to buy a cabinet hinge, you will see multiple types. We list the seven most common types to help you understand cabinet hinge varieties.
These are the most basic types of hinges that have two plates. One is attached to the stationary wall or a cabinet frame while the other is to the door, allowing it to swing open and closed.
Also known as European or cup hinges, these are used in modern cabinet designs. a These come with a mounting plate that secures to the cabinet and a cup that sits on the wall.
The feature that makes it popular nowadays is that these remain hidden when the cabinet door is closed. and are adjustable for a clean, flush look.
These special hinges are designed in three variations for cabinet doors and partially or fully overlay the cabinet frame.
Full overlay hinges are used for individual cabinets on either end of a row.
Contrarily, half or partial overlay hinges are used for a pair of cabinets in the middle of a row of cabinets. This is where two doors have their hinges mounted on opposite sides of a shared middle partition
Inset hinges are used for cabinet doors that are set within the cabinet frame. They are often decorative and can be concealed or exposed.
These are continuous hinges that extend along the entire length of the cabinet door. Since they are narrow, they are often used on piano lids and other long cabinet or cupboard doors.
These hinges are designed for bi-fold cabinet doors that fold in the middle. They allow the door to easily fold open which is designed to save space.
These hinges feature a mechanism that slows down the door's closing motion, preventing it from slamming shut.
These hinges have a spring mechanism that automatically closes the door when it's pushed within a certain range.
Installing your cabinet hinges can be taken as a DIY project if you have the right tools and skills for execution. Besides this, you need a set of instructions to follow so you do not miss out on ny step.
Fixing cabinet hinges is not a difficult task but it requires concentration and ample time for proper fixations. Follow our guide to achieve a perfect look for your cabinets.
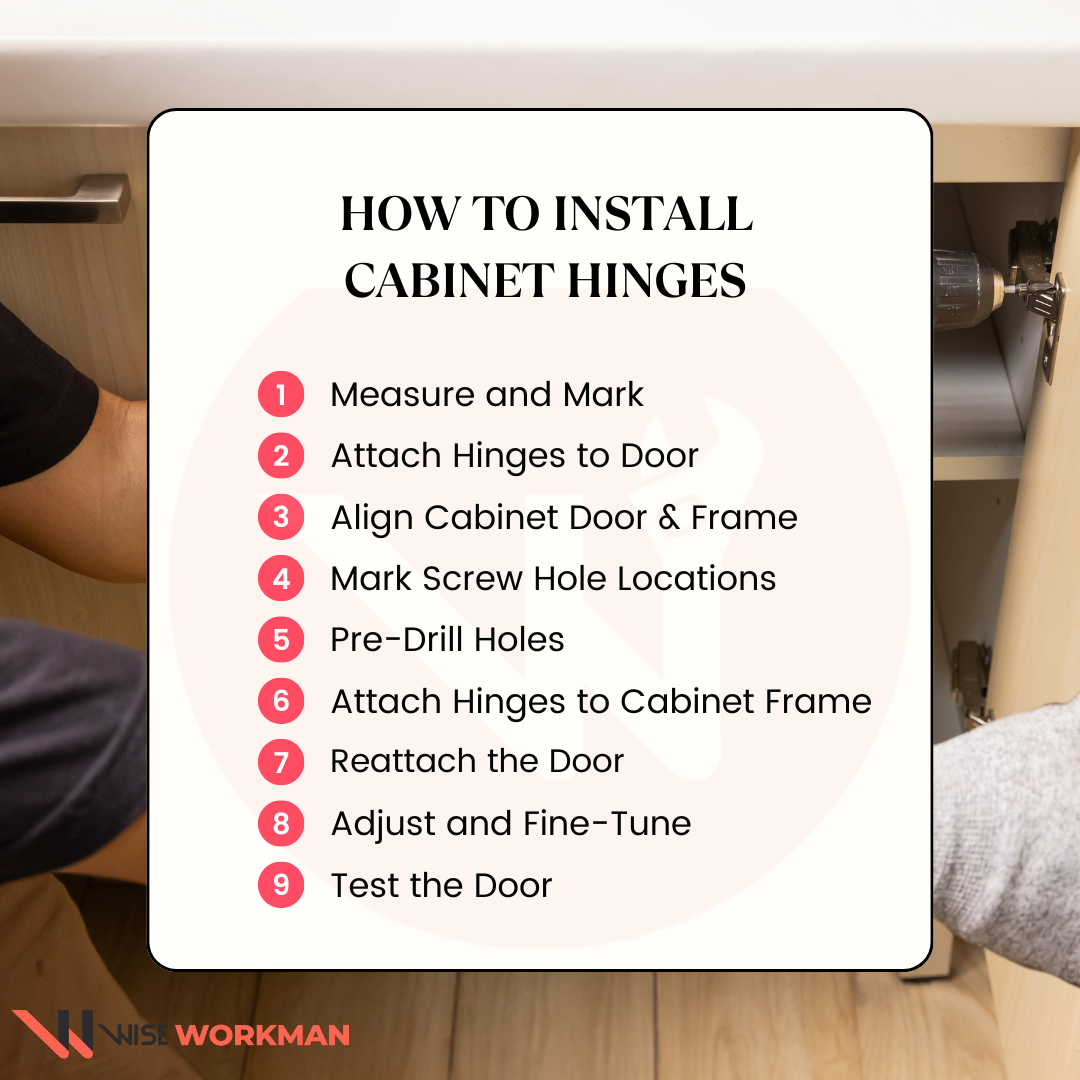
Before we install any hardware, it is necessary to take accurate measurements. This is to mark the placement and locate the exact point where you want the hinges to be placed on the door and the cabinet frame.
For a single cabinet door, measure in a way that the top and the bottom hinge is approximately 3 inches from the top and the bottom edge. If you have multiple doors, ensure the hinges are evenly spaced.
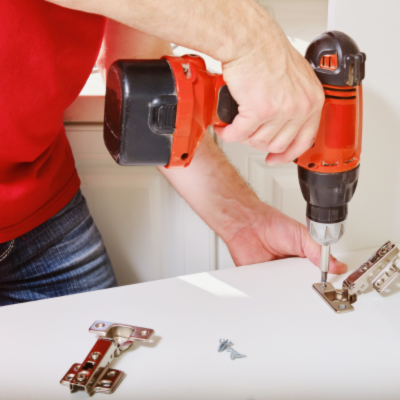
Hold the cabinet door perpendicular to the base and in place to attach the hinges to the door using the provided screws. Make sure the hinge plates are flush with the edge of the door.
You also have to ensure that you measure the hinge placement after closing the door. This helps you achieve alignment within the cabinet frame.
Ensure the door is level and the gap around the door is even around all four edges. Finally, use clamps to hold the door in place to prevent misalignment.
Once the cabinet door has been aligned, mark the locations of the screw holes on the cabinet frame where the hinge will be attached. This will guide where you need to drill the hinges to the door frame.
Remove the door and pre-drill pilot holes at the marked locations on the cabinet frame. Make sure you use a drilling bit to ensure the screw the holes are uniform in size.
Attach the hinges to the cabinet frame using the pre-drilled pilot holes.
Place the door back onto the hinges, ensuring it lines up with the frame. Open and close the door to check for smooth operation and ensure it stays level.
If the door does not close properly or isn't level, you may need to make minor adjustments to the hinge placement or tension.
Alternatively, you can cover the screw heads with hole plugs for a cleaner look. These are typically available in matching finishes.
Lastly, it is advised that you open and close the door several times to make sure it functions correctly and aligns properly with the frame.

Carrying out a DIY project does not guarantee a professional finish to your cabinet. If you want precision in your work, you need to have a knack for detailing and attention.
We bring you the top 3 cabinet hinge installation tips that professionals regularly practice during cabinet installation.
Consider using a hinge drilling template or jig for boring holes. This particular tool ensures a consistent hole placement and alignment, which is most likely to go wrong.
These templates are easily available for various hinge types and sizes. It makes it easier to achieve a professional look, especially when working with concealed hinges.
With the multitude of hardware available, it is challenging to select high-quality hinges that match your cabinet style and material.
If you start from scratch and go on to choosing a cabinet hinge, ensure they are appropriate for the cabinet door's weight and size. This determines the cabinet door's functionality and durability in the long run.
Use the correct size and type of screws to secure the hinges. Low-quality hardware can lead to hinge failure and affect the overall appearance and functionality of your cabinets.
Always pre-drill pilot holes for the screws in the cabinet doors. This omits the risk of the wood from splitting and ensures a secure and tight fit. Choose a drill bit that matches the size of the screws and use a depth stop to avoid drilling too deep.
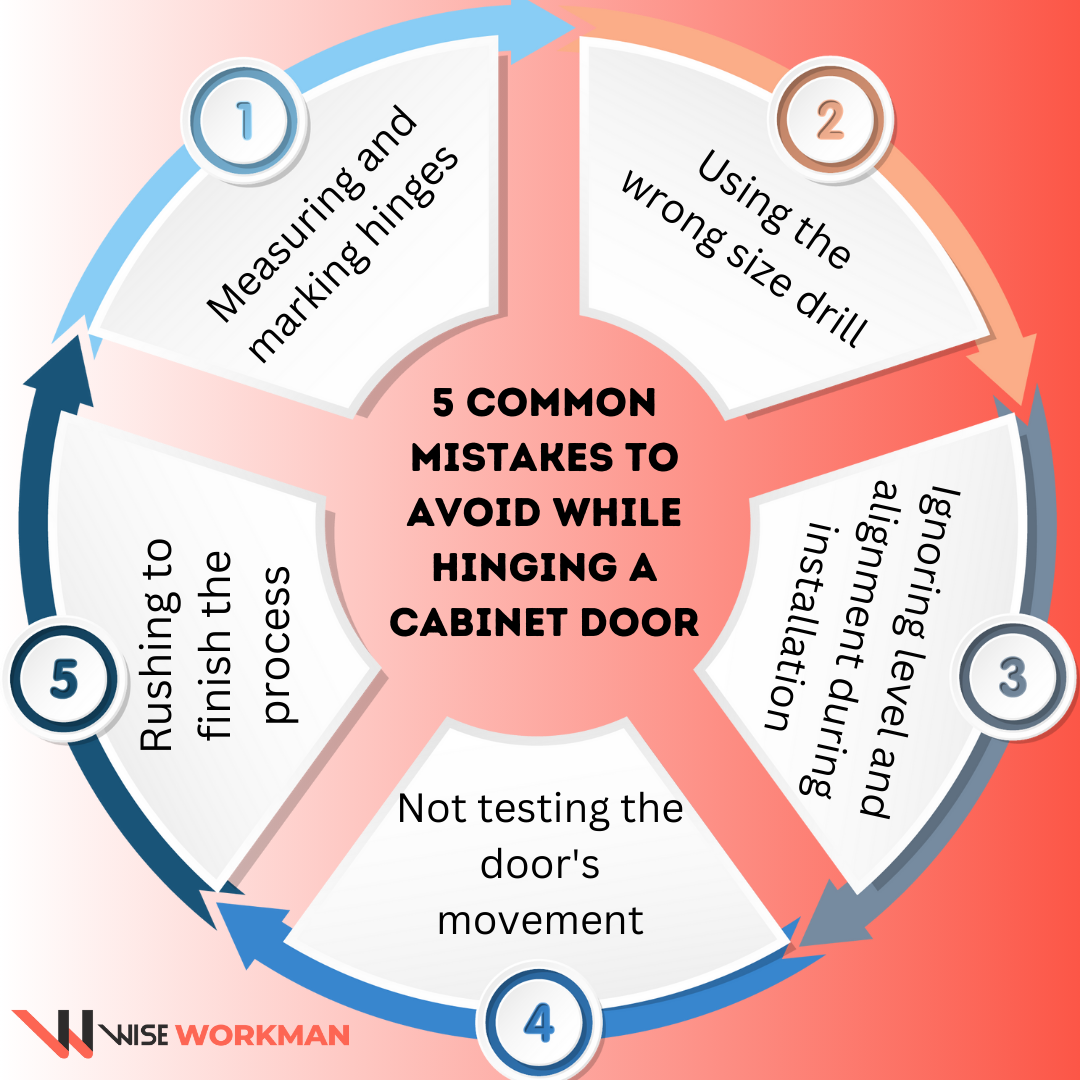
Installing cabinet hinges can incur minor mistakes which can disrupt the alignment and functionality of the cabinet. If you make any of these mistakes, follow our tips on avoiding cabinet hinge installation errors.
Solution: Use a tape measure along with combination squares, and hinge templates or jigs for precise measurements. Also, double-check the markings before finally drilling pilot holes to ensure accurate hinge placement.
Solution: Pre-drill pilot holes using the correct size bit and depth of the hole to match the length of the screw and avoid over-drilling.
Solution: Use a level to ensure the door is perfectly level and aligns with the cabinet frame.
Solution: Open and close the door multiple times to ensure it functions smoothly and aligns correctly with the frame.
Solution: Take your time with each step of the installation process and follow the manufacturer's instructions.

Although this guide aims to break down the steps of hinge door installation and make them easy to follow, the entire procedure is not an easy one.
The installation of the cabinet hinges depends on the type of hinge and the number of cabinets. This means you need to dedicate at least a day from collecting material to installing it.
In such cases, we recommend you consult and hire professionals who bring expertise and experience to the task. With these skills, they can carry out the installation with precision. Additionally, you do not have to worry about alignment or uneven cabinet doors.
If you do not have a toolkit, hiring a professional might be more cost-beneficial for a homeowner. They will save you time and frustration and get the cabinet hinge installation done in a few hours.
The conclusion on cabinet hinge installation is that a smoothly installed cabinet hinge makes the opening and closing of a door effortless. It guarantees security and eliminates the risk of a low-hanging cabinet door.
The steps of installing cabinet hinges are simple but vary depending on the type of cabinet hinge you choose. Follow the steps from measuring, marking, and drilling screw holes to attaching cabinet hinges.
We believe you can carry out the installation with ease if you do not rush through the process as it requires accuracy and constant testing before the final fixation of the hinges.