How to Paint Texture Walls – 3 DIY Techniques
 Author: Howard Griner | Updated on January 24, 2024 Author: Howard Griner | Updated on January 24, 2024
Navigating the world of wall textures can feel like learning a new language. From understanding the purpose of wall textures to selecting the right one for your space, the process is both an art and a science.
As someone who has spent years mastering this craft, I can assure you that the rewards of a beautifully textured and painted wall are well worth the effort.
In this article, we'll delve into the intricacies of wall textures, the importance of proper wall preparation, and the art of choosing the right paint, specifically addressing how to paint texture walls.
We'll also explore various painting techniques to bring your textured walls to life and share some common pitfalls to avoid. With a blend of practical advice and expert insights, this guide will empower you to transform your walls into a stunning canvas.
Wall textures are more than just a design choice; they're a practical way to add character and depth to your interior spaces.
These textures, which are often applied using a substance that's thicker than paint but thinner than drywall, serve to hide imperfections and seams in drywall, creating a visually appealing finish that also reflects light in interesting ways.
They're a key element of interior design, influencing the overall feel and aesthetic of a room. Whether you're aiming for a rustic charm or a sleek modern look, the texture of your walls plays a significant role in achieving your desired effect.
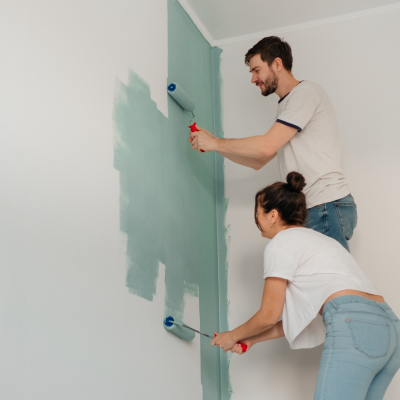
When it comes to painting textured walls, the roller you choose can make a significant difference. A paint roller is a tool that evenly applies paint onto large surfaces, making it ideal for textured walls.
The process is simple: dip your roller into the paint tray, roll it out to evenly distribute the paint, and then apply it to the wall in a 'W' motion. This technique ensures that the paint is spread evenly across the textured surface, reaching into the nooks and crannies of the texture.
Remember, the thicker the roller's nap, the more texture it can handle, so choose a roller with a medium to thick nap for best results.
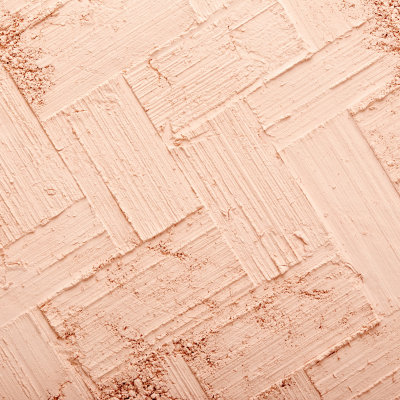
Adding texture to your walls while painting can create a unique aesthetic appeal. One way to achieve this is by using a sponge or a comb. After applying a base coat of paint, you can either ball up a rag and press it into the glaze or drag a comb through the glaze to create a textured effect.
Another method involves adding baking soda or silica sand to your paint to make it textured. Once you've mixed your paint, apply it to the wall using a shaggy roller or a sponge to pat the paint and create a texture. This technique can add depth and interest to your walls, making them stand out.
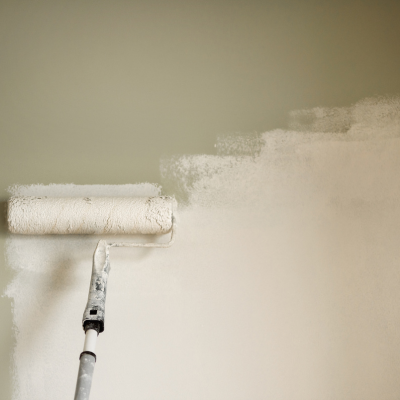
Achieving a perfect paint job on textured walls requires careful preparation and the right techniques. Start by preparing the wall: clean the surface, repair any damage or cracks, and apply an appropriate primer.
When painting, use the 'W' motion technique with a roller for an even application. Apply a second coat if necessary to ensure full coverage.
After painting, clean up any drips or spills promptly to prevent them from drying and becoming more difficult to remove. With these steps, you can achieve a professional-looking paint job on your textured walls, enhancing the beauty of your space.
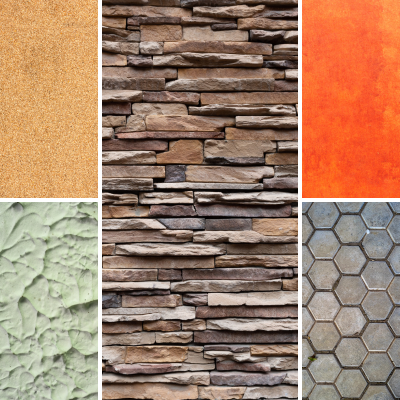
There's a wide variety of wall textures to choose from, each with its unique appeal and application technique. Some of the most common types include:
Each texture offers a different look and feel, so it's important to understand what each one brings to the table.
Choosing the right wall texture for your home involves considering several factors.
First, think about the architectural style of your home and the decor in each room. Some textures may lend themselves better to certain styles than others.
For example, a knockdown texture might complement a rustic or traditional design, while an orange peel texture might be more suitable for a contemporary setting.
Budget is another important consideration, as some textures require more materials or labor to apply.
Lastly, consider the lighting in your room. Light can dramatically affect the appearance of a wall texture, with some textures creating interesting shadows or highlights when lit from certain angles.
Remember, the right texture can transform a room, so take your time to choose one that fits your vision for your space.
Before you even open a can of paint, it's crucial to prepare your walls. This step is often overlooked, but it's the foundation of a good paint job. Proper wall preparation ensures that the paint adheres well to the surface, resulting in a smooth and long-lasting finish.
It involves cleaning the walls, repairing any damage, and smoothing out any rough spots. Skipping this step can lead to problems down the line, such as peeling or chipping paint.
So, while it might be tempting to dive right into painting, taking the time to prepare your walls can save you time and effort in the long run.

Before you start painting, your walls need to be as clean as possible. Dust, dirt, and grease can prevent the paint from adhering properly, leading to an uneven finish.
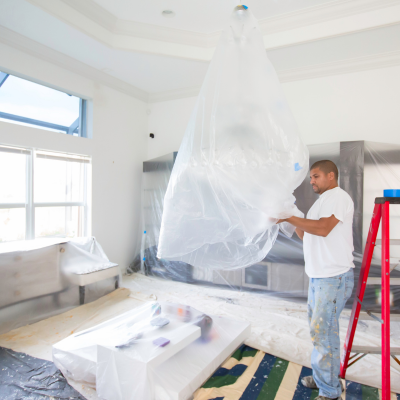
Preparing the room for painting is just as important as preparing the walls. This involves protecting your furniture and flooring from paint splatters. Here are some tips:
When it comes to choosing between matte and gloss paint, it's all about the look and feel you want to achieve. Matte paint, with its non-reflective finish, offers a soft and smooth look that hides imperfections well. It's perfect for spaces where you want a subdued, elegant feel.
However, it's worth noting that matte paint is less durable and harder to clean than its gloss counterpart.
On the other hand, gloss paint reflects light, creating a shiny and vibrant finish. It's highly durable and easy to clean, making it a great choice for high-traffic areas or rooms exposed to moisture, like kitchens or bathrooms.
However, its reflective nature can highlight imperfections on the wall surface. In essence, the choice between matte and gloss comes down to your personal preference, the room's function, and the aesthetic you're aiming for.
Choosing the right paint for textured walls requires careful consideration. A common recommendation is to use paints with satin or eggshell finishes as they provide a balance between matte and gloss, highlighting the texture without being overly shiny.
When selecting the color, neutrals often work well with textured walls as they allow the texture to stand out. However, don't shy away from bold colors if it suits your style and the room's decor.
Remember, high-quality paint will adhere better to your textured wall, resulting in a more durable and attractive finish. So, it's worth investing in the best paint you can afford.
Paint labels carry a wealth of information that can help you make an informed choice. Here's a quick guide to understanding them:
When painting textured walls, there are several common mistakes that people often make. One of the most frequent errors is not preparing the wall properly before painting.
This includes not cleaning the walls thoroughly, failing to repair any damage or cracks, and skipping the primer. Another common mistake is not using the right tools for the job.
For textured walls, a roller with a medium to thick nap is recommended, but many people use a roller with a thin nap or even a brush, which can lead to uneven paint application.
Additionally, many people apply too few coats of paint, resulting in patchy coverage, or they apply the paint too thickly, leading to drips and runs.
Lastly, many people make the mistake of painting in dim light, which can make it difficult to see and correct any errors.
Avoiding common painting mistakes is crucial for achieving a perfect paint job on textured walls. Here are some tips to help you avoid these errors.
First, always prepare the wall properly before painting. This includes cleaning the walls, repairing any damage or cracks, and applying an appropriate primer.
Second, use the right tools for the job. For textured walls, a roller with a medium to thick nap is recommended.
Third, be mindful of the amount of paint you apply. Too few coats can result in patchy coverage, while too much paint can lead to drips and runs.
To avoid this, apply the paint in thin, even coats and allow each coat to dry completely before applying the next.
Lastly, always paint in good lighting conditions to ensure you can see and correct any errors. By following these tips, you can avoid common painting mistakes and achieve a professional-looking paint job on your textured walls.
While you can technically use any type of paint, certain types work better for textured walls. Paints with satin or eggshell finishes are often recommended as they provide a balance between matte and gloss, highlighting the texture without being overly shiny.
High-quality paint will adhere better to your textured wall, resulting in a more durable and attractive finish.
The waiting time between coats can vary depending on the type of paint you're using. However, a general rule of thumb is to allow the first coat to dry completely before applying the next. This can take anywhere from a couple of hours to overnight. Always check the paint can for specific instructions.
Yes, you can add texture to your walls while painting. This can be achieved by using a sponge or a comb to create a textured effect after applying a base coat of paint. Another method involves adding baking soda or silica sand to your paint to make it textured.
If you make a mistake while painting, don't panic. If the paint is still wet, you can often wipe it off with a damp cloth. If it's already dried, you may need to sand it down and repaint the area. Remember, preparation and careful application are key to avoiding mistakes.
Maintaining painted textured walls involves regular cleaning and touch-ups as needed. Use a soft brush or vacuum with a brush attachment to gently remove dust and dirt from the texture. If you notice any chips or scratches, touch up the paint as needed to keep your walls looking their best.
In essence, painting textured walls is a task that requires careful planning and execution.
From understanding the nature of wall textures and selecting the right one for your space to preparing the walls and choosing the right paint, each step plays a crucial role in achieving a perfect finish.
The painting techniques used, particularly when using a roller and applying texture, can significantly impact the final look. Avoiding common painting mistakes is also key to ensuring a professional result.
By following the tips and advice provided in this article, you can learn how to paint texture walls. Happy painting!